What is an Epoxy Coffee Table?
At a technical level, an epoxy coffee table is simply a coffee table whose table top features an epoxy resin topcoat. In reality, though, it's not just a piece of furniture; it's a work of art, a conversation starter, and a unique addition to your living room decor.
The beauty of an epoxy coffee table comes from the incredible customization and personality you can give it. Through the use of epoxy pigments, resin dyes, and other additives, you're able to completely tailor your coffee table's appearance to make it unique to you and your aesthetic desires.
You can even suspend objects within the resin, creating a table that encapsulates a moment in time. With some planning beforehand and a little effort, even a complete beginner can craft their own stunning epoxy table tops.
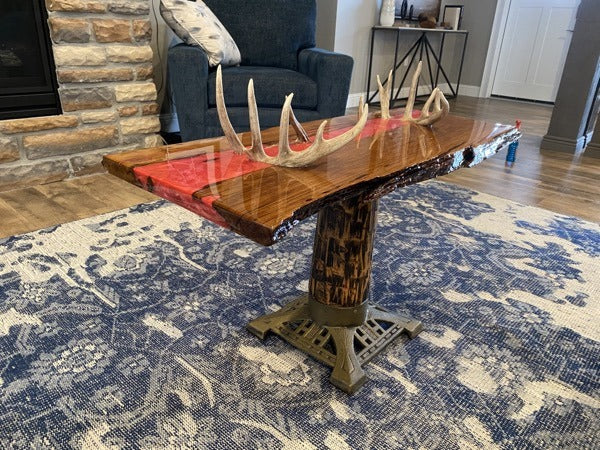
One particularly popular design is the epoxy river coffee table. This design uses two pieces of live edge wood with the epoxy resin poured between them, creating the illusion of a flowing river. The distinct contrast between natural wood and sleek, glasslike resin makes for a striking, unforgettable piece of furniture.
Best of all, you can make one yourself!
The Basics of Epoxy Resin
Before you dive into making your own epoxy coffee table, it's important to understand the basics of epoxy resin. The first thing you need to know is that almost all epoxy is two-part, meaning it is stored as two separate liquid components, which react to each other and solidify when mixed together.
Epoxy resin is known for its incredibly strong adhesive properties. It can bond to almost any surface, making it a versatile material for a wide range of DIY projects. It's also resistant to physical damage such as scratching and denting, as well as many chemicals. It's also waterproof and features light heat resistance, making making it an excellent choice for furniture, especially coffee tables that might be exposed to spills and other messes.
Another key feature of epoxy resin is its high-gloss finish. When cured, it creates a smooth, glass-like surface that's both visually stunning and easy to clean. This makes epoxy resin coffee tables not just beautiful, but practical as well.

Understanding Epoxy Pigments and Resin Dyes
Creating a truly stunning epoxy coffee table involves more than just clear resin. By using epoxy pigments or resin dyes, you can add color, depth, and personality to your table. These colorants are mixed into the epoxy resin before it's poured, transforming the clear material into any hue you can imagine.
Epoxy pigments are typically powdered or solid substances that are mixed into the resin. They provide opaque coloration, making them a great choice if you want bold, vibrant colors.
Resin dyes, on the other hand, are liquid colorants that dissolve into the resin. They provide a transparent or translucent coloration, perfect for creating tinted or stained-glass effects.
Remember, the key to achieving the perfect color is experimentation. Don't be afraid to mix different pigments or dyes together to create your own custom shades. And always test your color on a small piece of material before pouring it into your mold.
DIY: How to Make Your Own Epoxy Coffee Table
Creating your own epoxy coffee table might seem daunting, but with the right tools and just a bit of patience, it's a project that's well within your reach, even as a newcomer. The process involves several steps, from preparing the wood and mixing the resin, to pouring the epoxy and finishing the table.
Step One
The first step is to choose and prepare your wood. You'll need two pieces of live edge wood, which will form the banks of your "river". These should be cleaned, sanded, and sealed (which you can do with an epoxy seal coat) to ensure a smooth, clean surface for the resin to adhere to.
Step Two
Next, you'll need to mix your epoxy resin. Be sure to follow the manufacturer's instructions carefully to ensure a successful cure.
Step Three
Once your resin is mixed, you'll need to add your pigments or dyes right away. This is where you can get creative, choosing colors that match your decor or reflect your personal style. Remember to mix thoroughly to ensure an even color.
Step Four
The final steps involve pouring the resin, allowing it to cure, and then finishing the table. This might involve additional sanding or some polishing, depending on your desired aesthetic goals.
Tips for Working with Epoxy Pigments
Working with epoxy pigments is a fun and creative process, and with a few tips, you can make it easier to obtain optimal results!
First: if you're worried about having enough time to mix your pigments into the epoxy, you can always add them preemptively before mixing the epoxy components together. If you do this, always add them to the resin component, not the hardener. This will ensure an even color and a successful cure.
Second: when adding colorants, start with a small amount and gradually add more until you achieve your desired color. Remember, you can always add more pigment or resin dye, but you can't take it away.
Third: when mixing your pigment into the resin, be sure to mix thoroughly to avoid streaks or clumps of color. And we recommend that you always test your color on a small piece of material before pouring it onto your project surface or into a mold.
Maintaining Your Epoxy Coffee Table
Once you've put all that effort into creating your epoxy coffee table, you'll want to keep it looking its best. Luckily, maintaining an epoxy coffee table is relatively straightforward.
Firstly, always use coasters or mats to protect the surface from high heat (e.g., a super hot cup of tea or coffee). Although epoxy resin is resistant to heat, prolonged exposure at high temperatures can cause damage over time.
For regular cleaning, simply wipe the surface with a soft cloth and mild soap. That's right—using just soap and water will clean your surface easily, thanks to the ultra-smooth finish of hardened epoxy resin. Avoid using harsh chemicals or abrasive cleaners, as these can scratch or dull the surface.
Though unlikely, if your table does get scratched, don't worry—it can be repaired. Simply sand the area with fine-grit sandpaper, then pour a new coat of epoxy over it to restore it to like-new condition.

Where to Purchase Pigmently Pigments
Now that you're ready to create your own epoxy coffee table, you're probably wondering where to get your hands on epoxy colorants.
At Pigmently, we offer top-quality epoxy pigments and resin dyes ideal for long-lasting epoxy projects. Our premium pigments are available in our online store and come in a wide range of colors and visual textures, making them a great choice for your DIY project.
Whether you're looking for vibrant, bold colors or subtle, earthy tones, Pigmently has something to suit every style. Plus, our pigments are easy to use and mix very well with epoxy resin.
So why wait? Start creating your own stunning epoxy coffee table with Pigmently pigments today!